PRIMA get started
- PRIMA stands for PRoduct Information Management Application
- Easy-to use browser-based app
- Allows you as supplier to maintain images for your products yourself
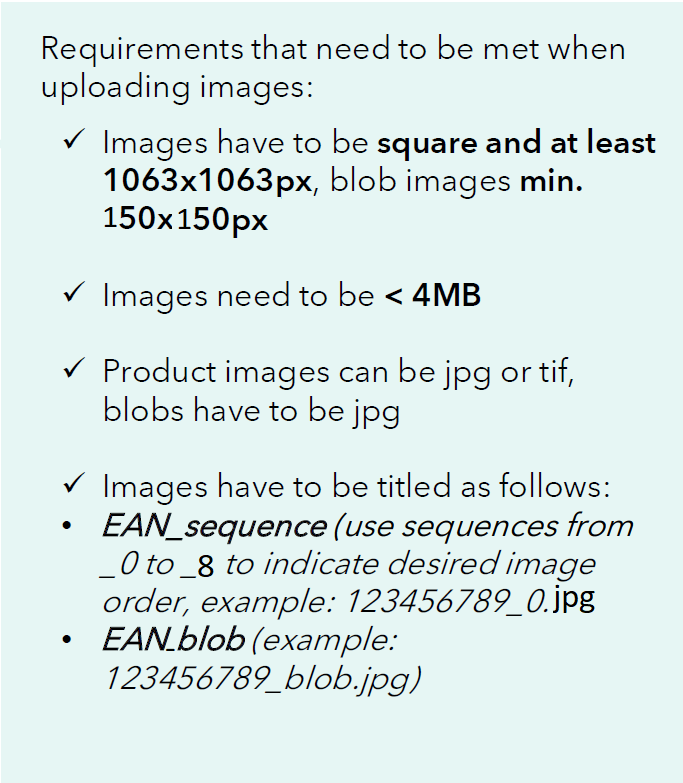
For Product Pictures please use PRIMA Tool to load up product assets following our requirements.
With the tool Prima, we can assure that the images are in the required quality and dimensions for our shops while saving a lot of manual work at the same time for both you and us. The simplified maintenance processes will allow more time for quality assurance and better product data. Up to now, PRIMA can be used for new picture upload as well as for deleting or changing position of earlier delivered assets. We are currently working on many more functionalities within the tool. Updates about those features will follow soon. You will be assigned to your brands and tenants and can only upload images to your respective products. The Douglas Master Data Team will approve your previously uploaded images and edit them, if necessary. Afterwards, the new images will be transferred to the shop.
Training Video:
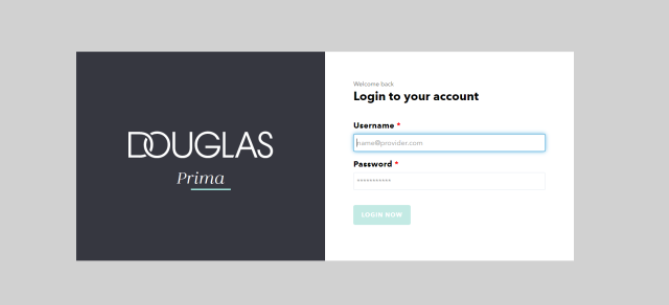
Login:
Login and access PRIMA by using your credentials.
We will provide you access data via mail before
your first login.
Don’t have login data or problems with accessing
the tool? Feel free to contact us.
prima@douglas.de
Images Upload
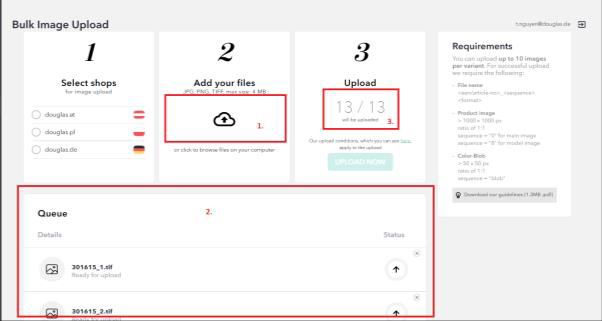
Choose the respective shop(s). The Start upload
button on the right (Step ), will change its color and
you will be able to click on it.
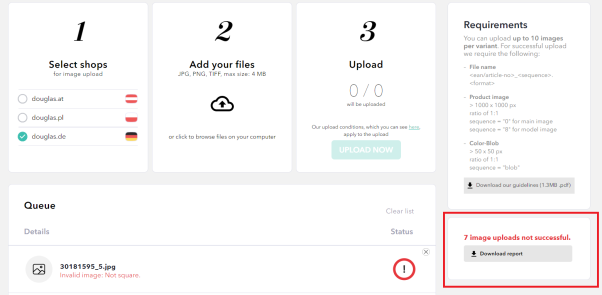
Click on the upload button in Step 2 (1.) or Drag &
Drop the desired images into the upload section.
The selected file are then listed in the queue below
2.). In Step 3 you can see the total amount of
selected images ( 3.)
Click on the button Upload now . The status of the
upload process will be in the queue section below.
As mentioned, Step 3 will give you information
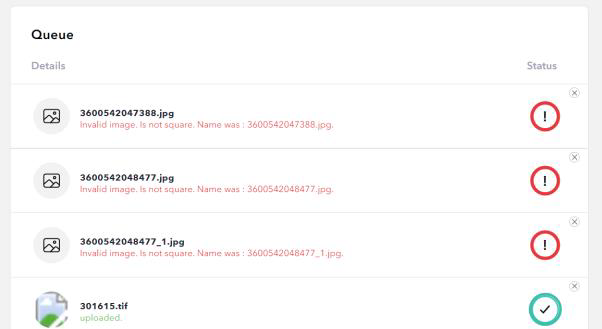
about the total amount of uploads. The queue will
show you successfully uploaded pictures with a
green circle and a checkmark, failed uploads will
show a red circle with an exclamation mark and a
short description about why the upload has failed.
After your upload, a report section will appear on
the right side which is especially helpful if your
upload contained invalid images. You can download
a CSV file with short descriptions on the failed
uploads in order to correct the respective images.
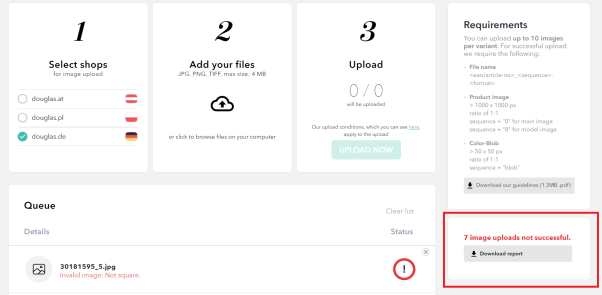
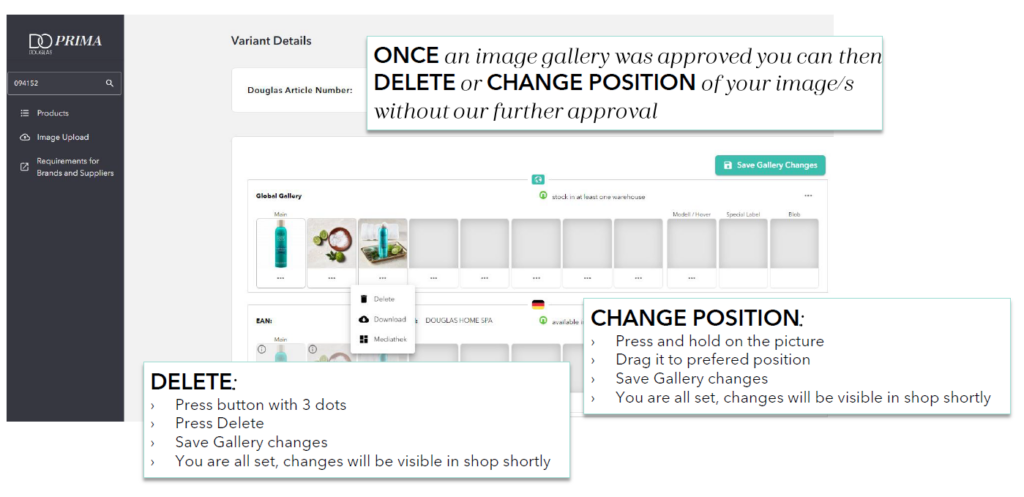
Image swap / delete
- Search for your desired EAN/Article no in the main search field.
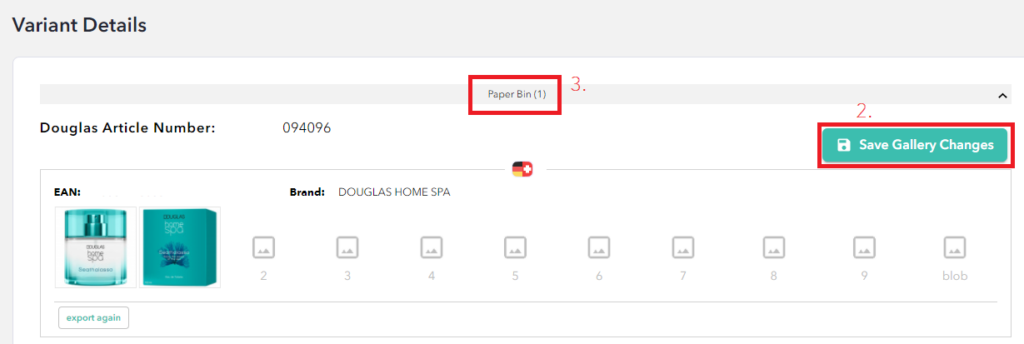
- Choose the picture you want to change position of o r delete. While holding the left mouse key,
drag the selected picture to your desired position ( 1.). After sorting the gallery, please press
Save Gallery Changes ( 2.)

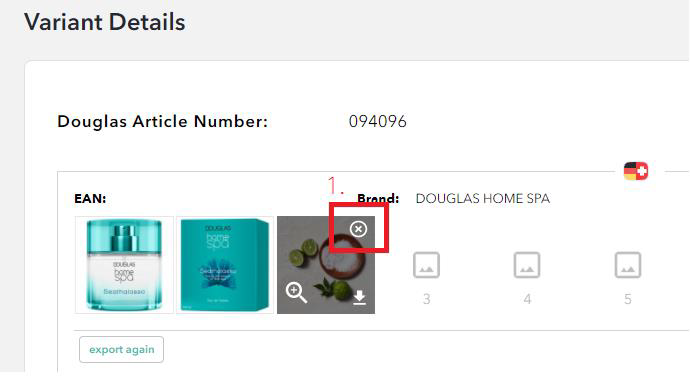
3. Choose the picture you want to delete. After pressing the delete icon (1.) on right top corner of
the image you can then press Save Gallery Changes (2.)
!IMPORTANT! If you have deleted wrong image, you can still access it in Paper Bin (3.) above the
article gallery.
Dashboard

WITH SUGGESTIONS: Here you can see images you have already uploaded but have not yet been approved – no To Do for you.
CRITICAL GO-LIVE DATE, WITHOUT SUGGESTIONS: Here you can see products which have a prompt go live date but still miss their product images. – To-Do: Uploading images timely
IN STOCK, WITHOUT SUGGESTIONS: Here you can see all products which are already in stock but still miss images. – To-Do: Uploading images asap
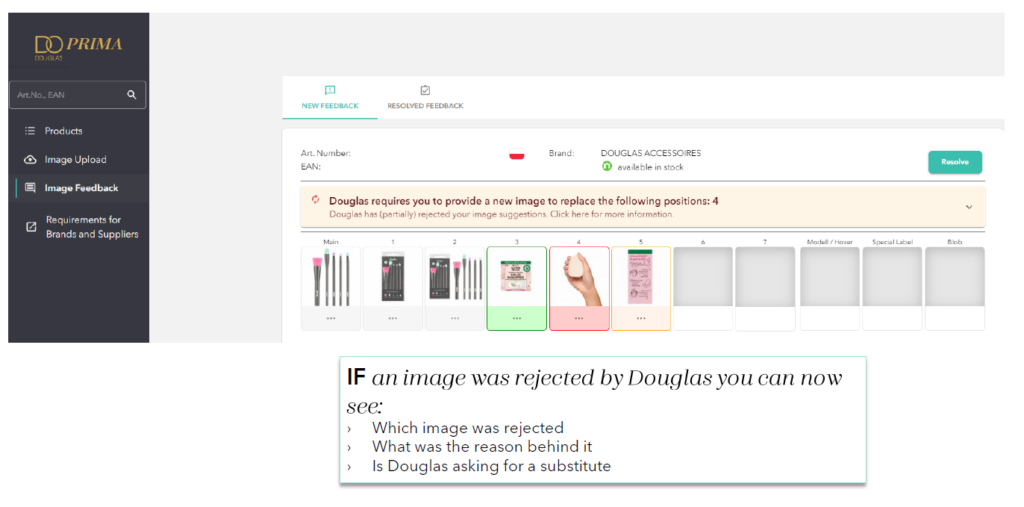
FEEDBACK: Here you can see all images we rejected from our site as they didn’t fulfill our requirements – To-Do: Adapting images or uploading missing ones and afterwards, removing those cases from your dashboard by using button “Resolved”
Update
WHERE IS PRIMA AVAILABLE RIGHT NOW?
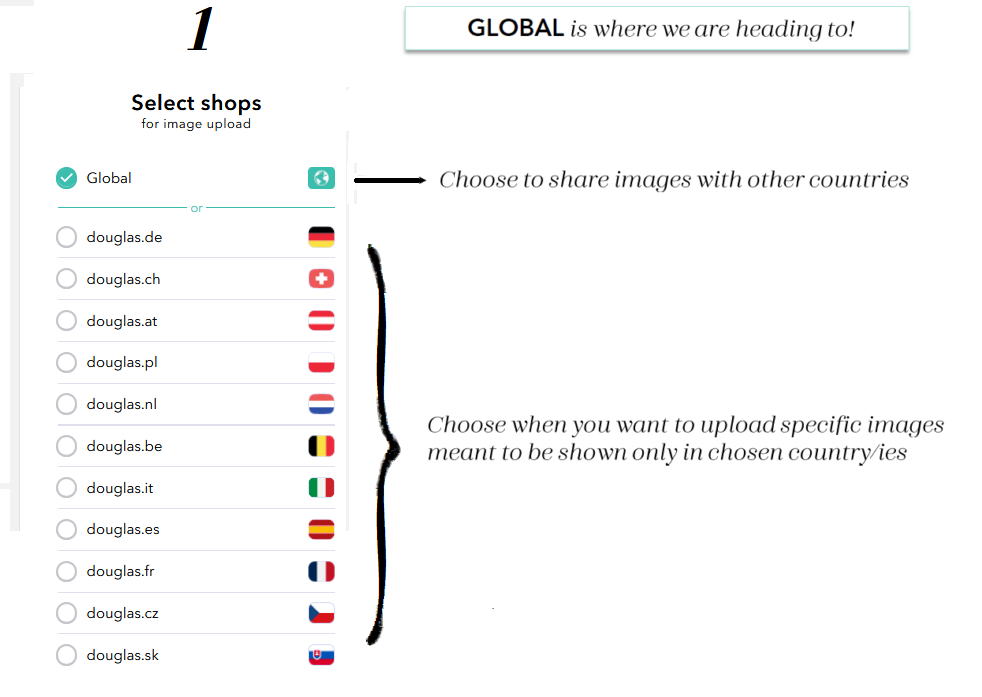
GLOBAL TENANT
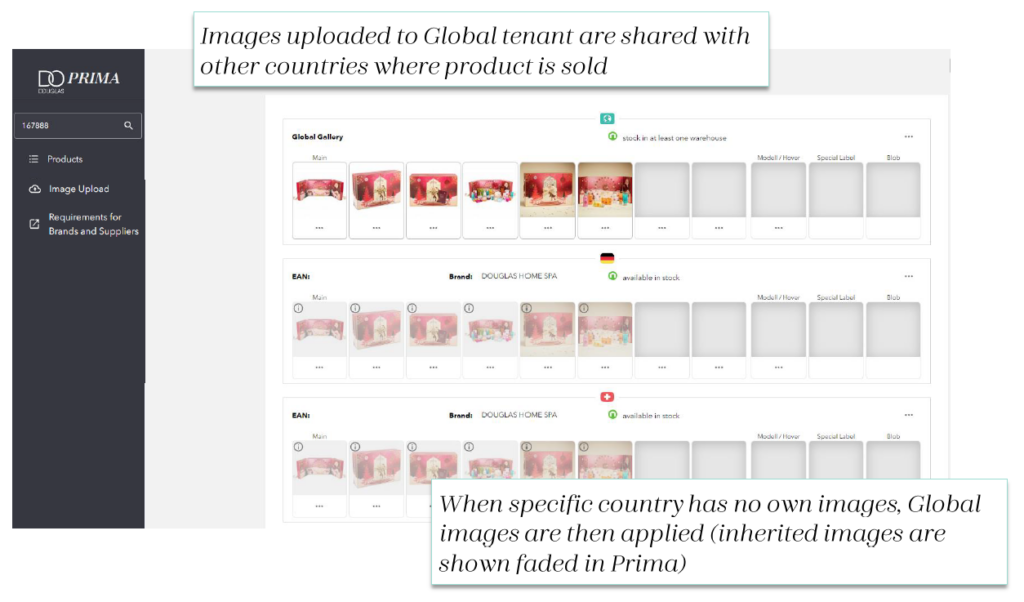
COUNTRY SPECIFIC IMAGES
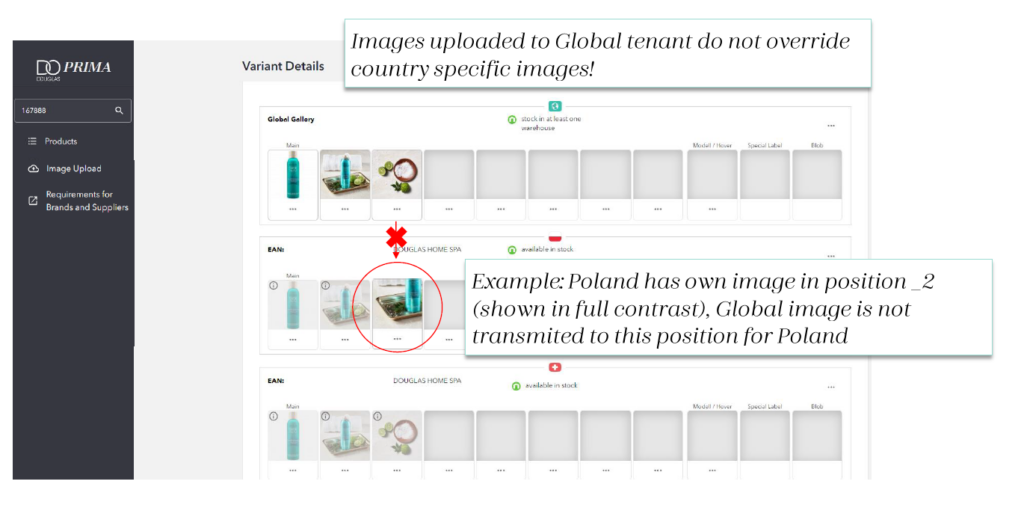
IMAGE FEEDBACK PAGE
DELETE OR CHANGE POSITION
